Timelines
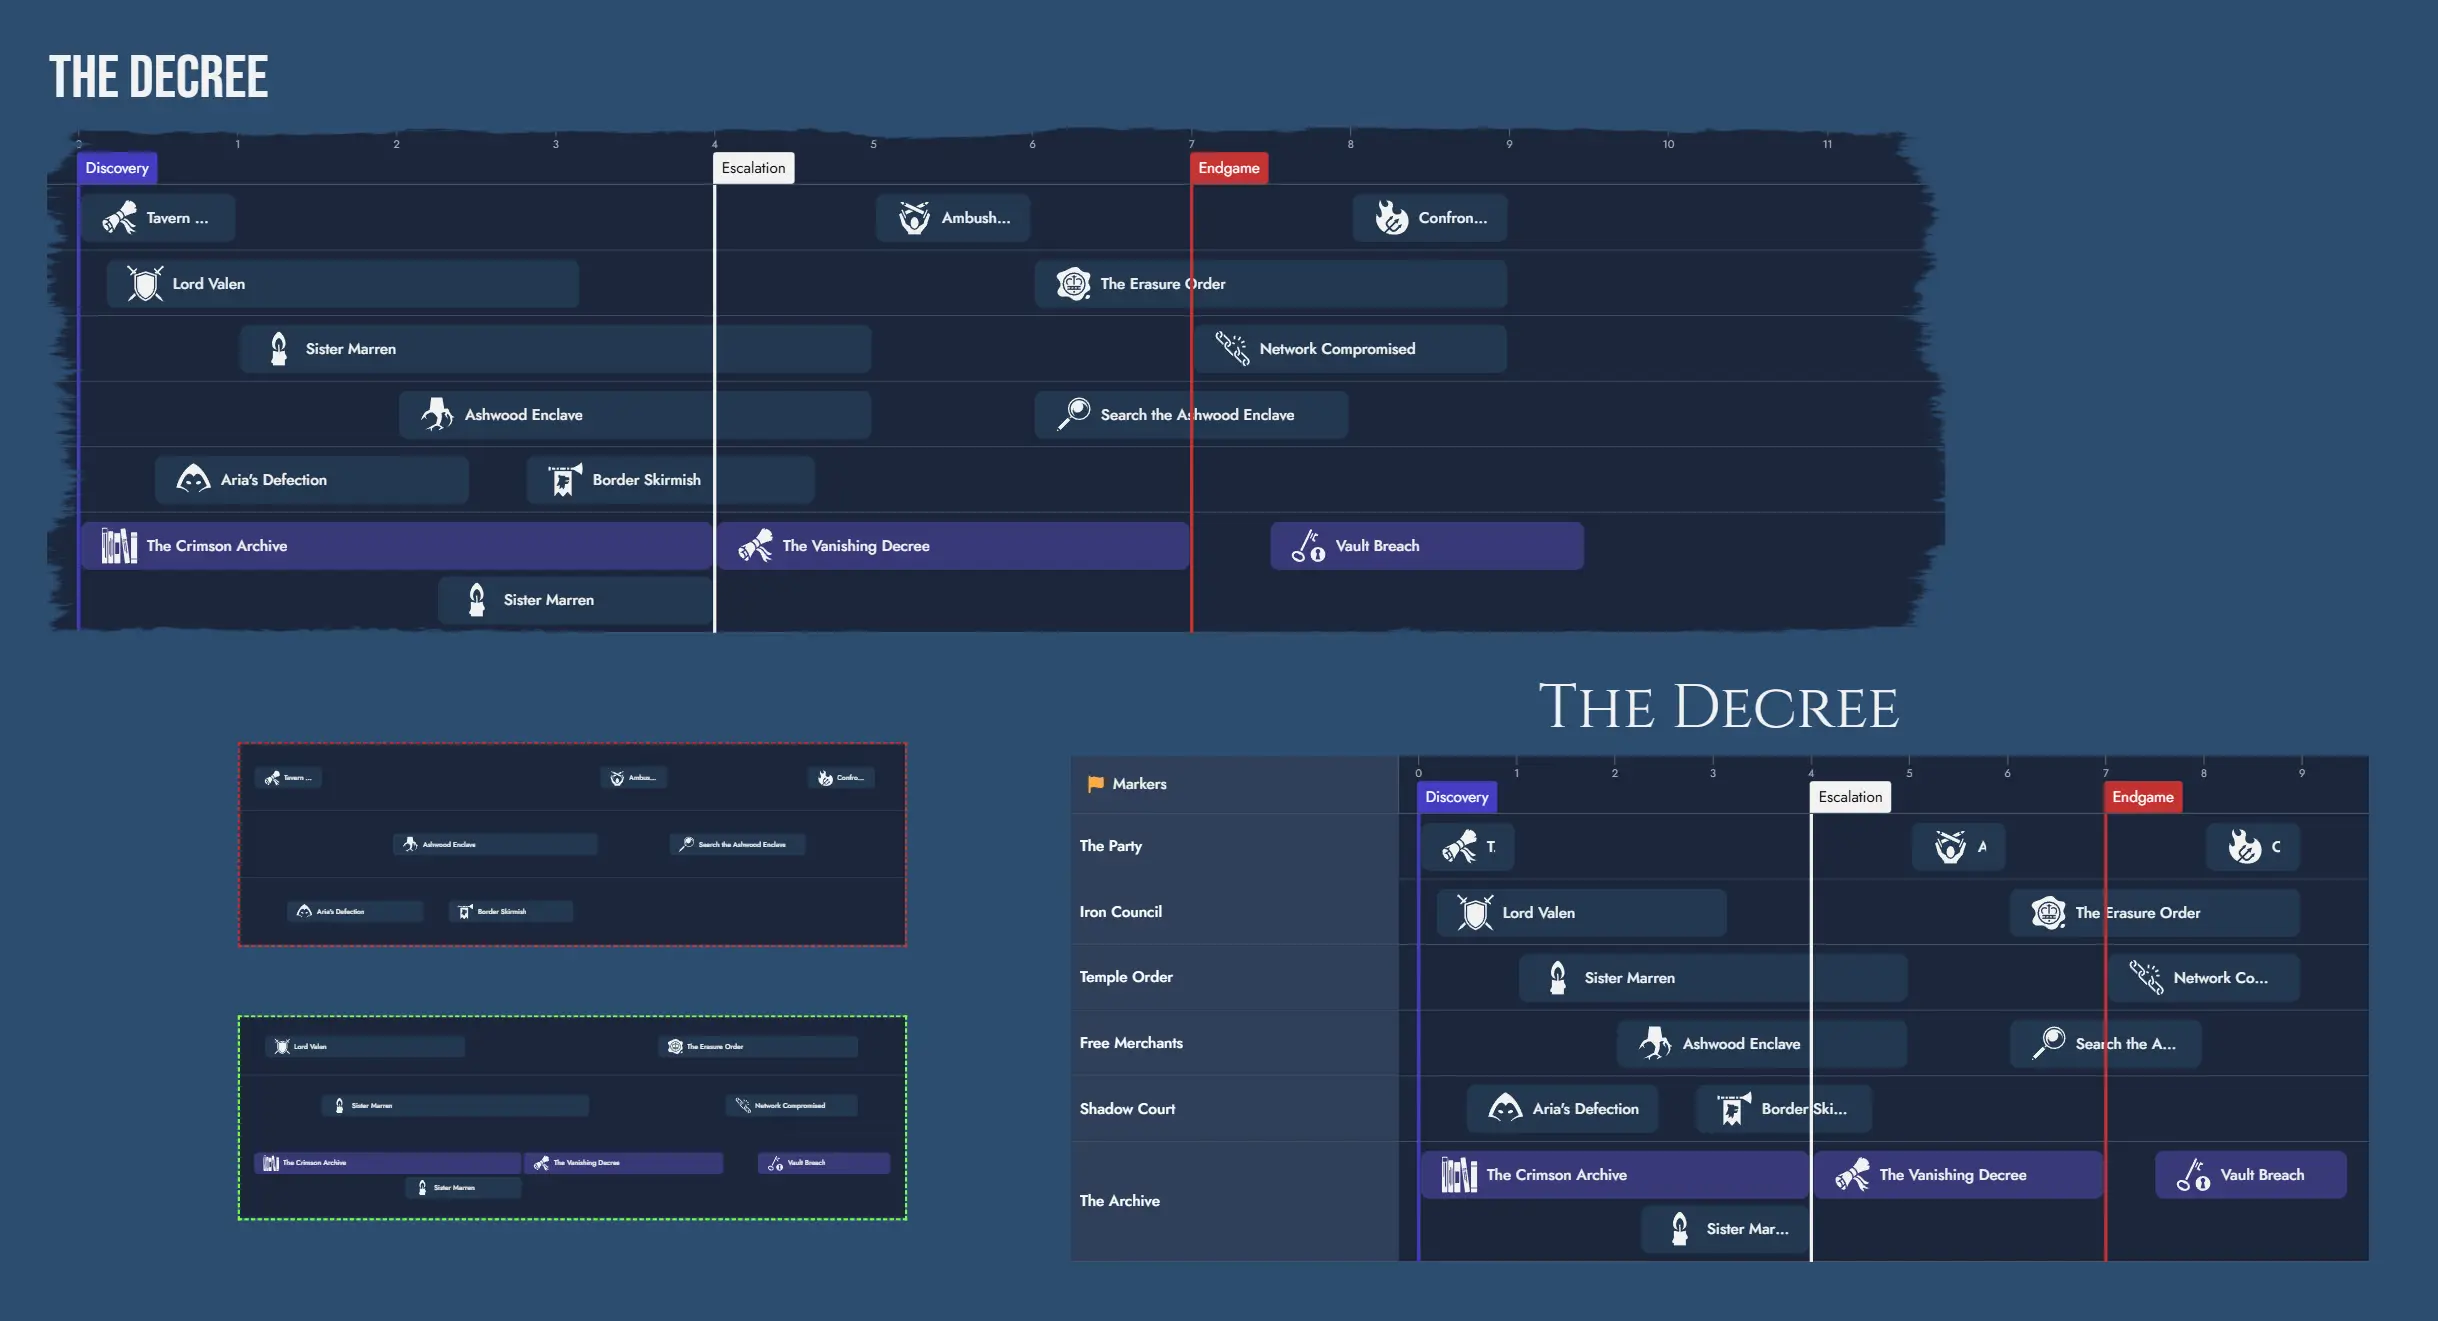
Timelines are a Construct Asset, the second after Maps. A Timeline represents a sequence of events or narrative beats arranged horizontally. It is not a calendar tool. Its purpose is to serve as a sequence-based or order-based lens on the Nodes of a Module, helping you understand how events relate to each other, see parallel threads across characters and factions, and reason about the shape of your world, adventure, or campaign.
A Module can hold as many Timelines as you need. Timelines can be placed on the Board as Timeline Tokens, allowing you to view and interact with your sequence directly in your workspace.

Elements
Every Timeline is composed of three types of elements: Lanes, Markers, and References.
Lanes
A Lane is a horizontal track that groups References visually. A Lane may represent factions, character arcs, parallel plots, sessions, or any other grouping you find useful.
- Lanes have a label, a color, and a featured image, all customizable.
- Lanes can be collapsed and expanded. A collapsed Lane displays only its header row, hiding all References while remaining visible so you can expand it at any time. The Lane header shows a compact Reference count (e.g. "(5 refs)") when collapsed.
- Lanes can be reordered vertically.
- Lane height grows dynamically to accommodate overlapping References, giving a visual signal of denser or more complex periods.
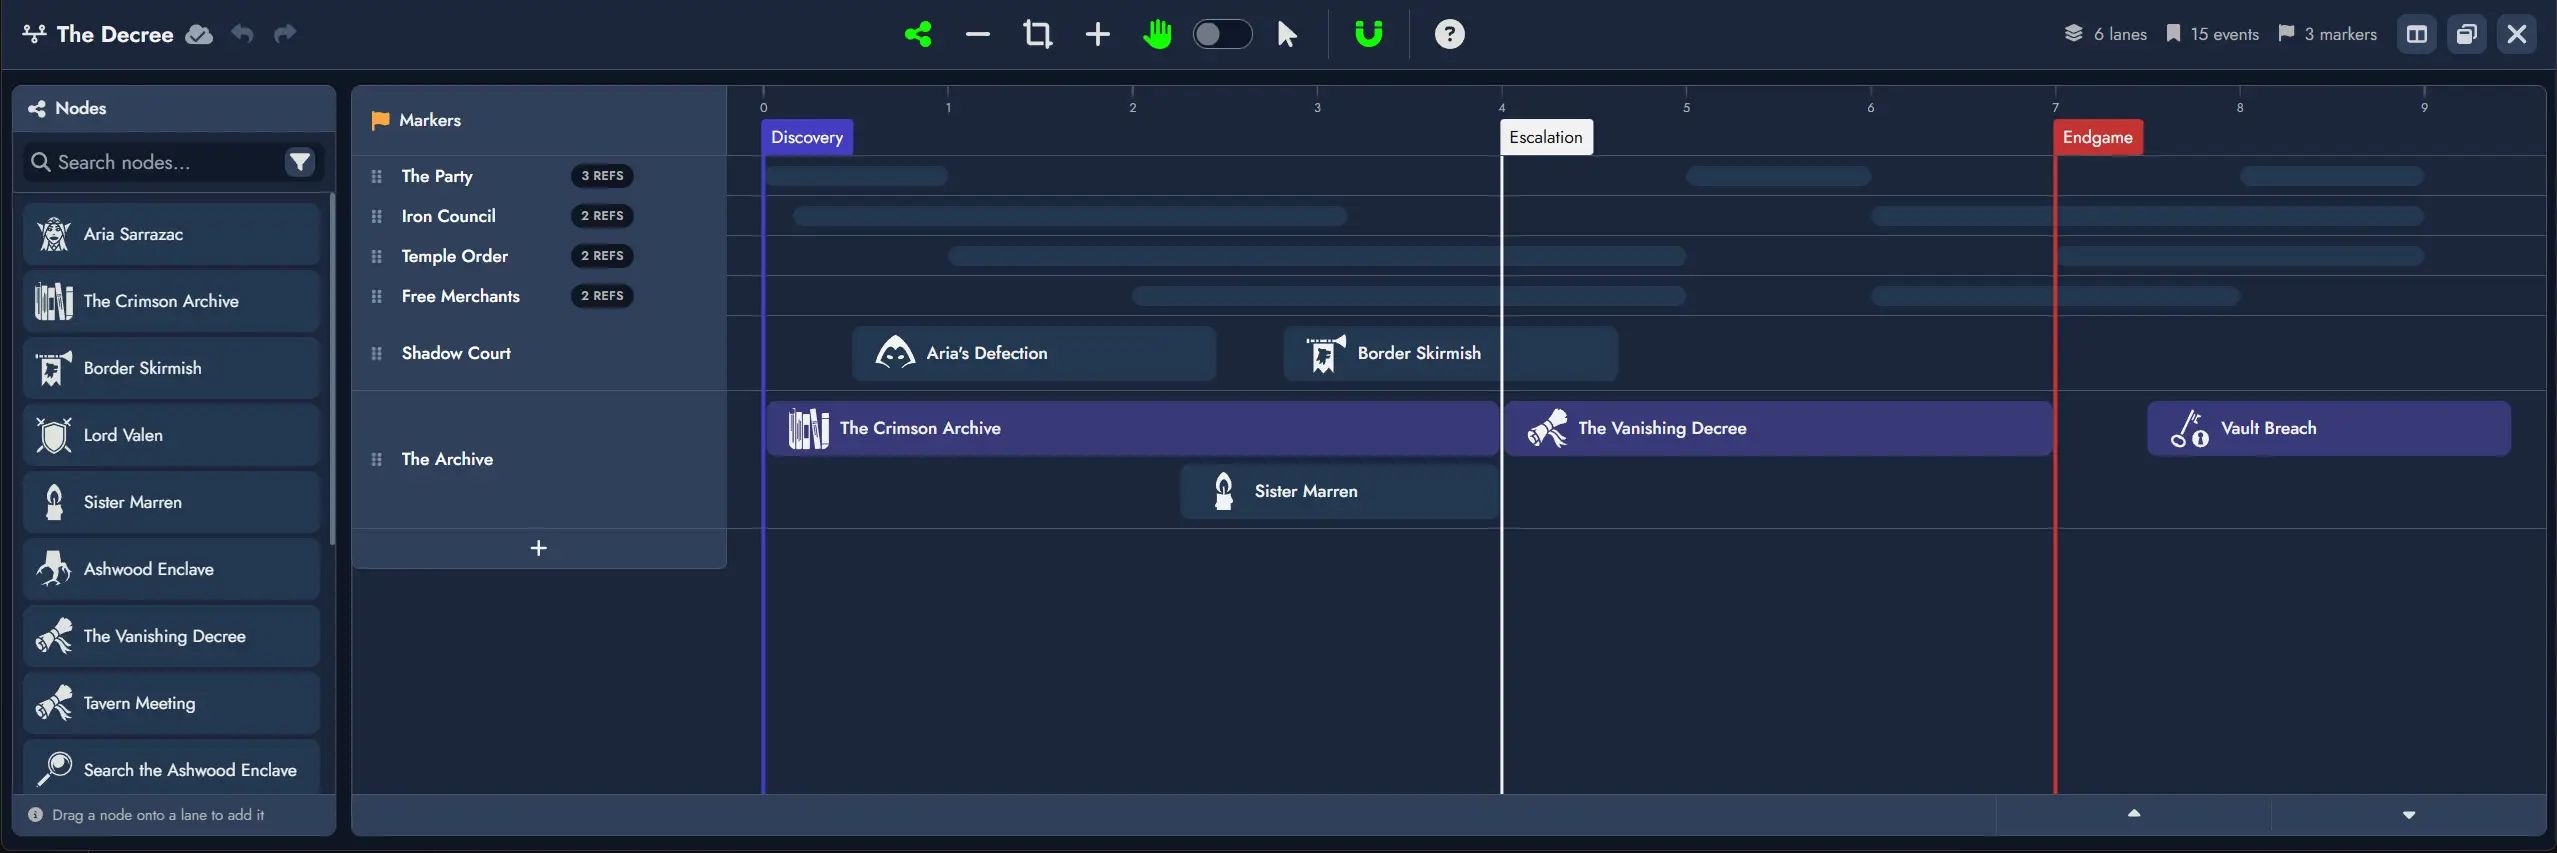
Markers
A Marker is a vertical line placed on the horizontal axis that divides the sequence into labeled sections. Markers are global to the Timeline and freeform: they do not enforce any specific unit of time or chronology.
- Markers have a label, a font color, and a background color, all customizable.
- Markers can be dragged along the axis without affecting References, which are positioned independently.
- Multiple Markers may share the same horizontal position. When stacked, each Marker keeps its own label and visual style and they display as a small stack.
- Markers span the full height of all Lanes.
References
A Reference is an item placed inside a Lane. Every Reference is linked to a Node.
- A Reference displays the Node's featured image (or default type icon if none is set) and the Node's name.
- Multiple References can be linked to the same Node.
- References can be customized with font color, icon color, and background color.
- Double-clicking a Reference opens the linked Node in the Editor.
- When viewing a Timeline Token on the Board, hovering over a Reference opens the Node Details panel.
Creating a Timeline
There are two ways to create a new Timeline:
- From the Board's context menu: Right-click (or long press on mobile) anywhere on the Board to open the context menu, then select "Add Construct" and then "Add Timeline".
- From the Board's toolbar: Click the "Add Timeline" button in the Board's Add Constructs toolbar: .
The newly created Timeline will be added to the Board as a Timeline Token. You can then open it in the Timeline Editor to begin adding Lanes, Markers, and References.
The Timeline Editor
The Timeline Editor is a dedicated interface for building and editing your Timelines. It opens in full-screen mode by default, and also supports windowed mode on the Board using the button. A Split view button lets you display the Timeline Editor and the Page Editor side by side in full screen.
On creation, a Timeline starts with a single Lane and no Markers or References.
Layout
The Timeline Editor is composed of four main areas:
- Top toolbar - global actions and stats (lane count, event count, marker count).
- Node Pool - left sidebar listing all Nodes available for placement.
- Markers row - the fixed top row of the timeline grid, showing Marker labels and where new Markers can be placed.
- Lane rows - the main editing area, one row per Lane.
Toolbar
The Timeline Editor toolbar includes:
- Hide/Show Node Pool toggle to display or hide the left Node Pool panel.
- and buttons to zoom in and out.
- Fit to Content button that automatically adjusts the zoom level so every Reference becomes visible on screen.
- Navigation mode toggle to switch between Drag Mode and Selection Mode. The V key can also switch between the two modes.
- Snapping toggle. When enabled, dragged References align to unit boundaries on placement, move, and resize.
Mouse Wheel Navigation
When the Timeline Editor has focus, the mouse wheel behaves as follows:
- Default: drags the timeline horizontally.
- Shift + scroll: scrolls timeline Lanes vertically (only when not all Lanes are visible).
- Ctrl + scroll: zooms in and out.
Node Pool
The Node Pool lists all Nodes in the Module and is the primary source for creating References. It defaults to showing all Nodes, and standard search filters are available (name, node type, tags). Drag a Node from the Node Pool onto a Lane to create a Reference at that position.
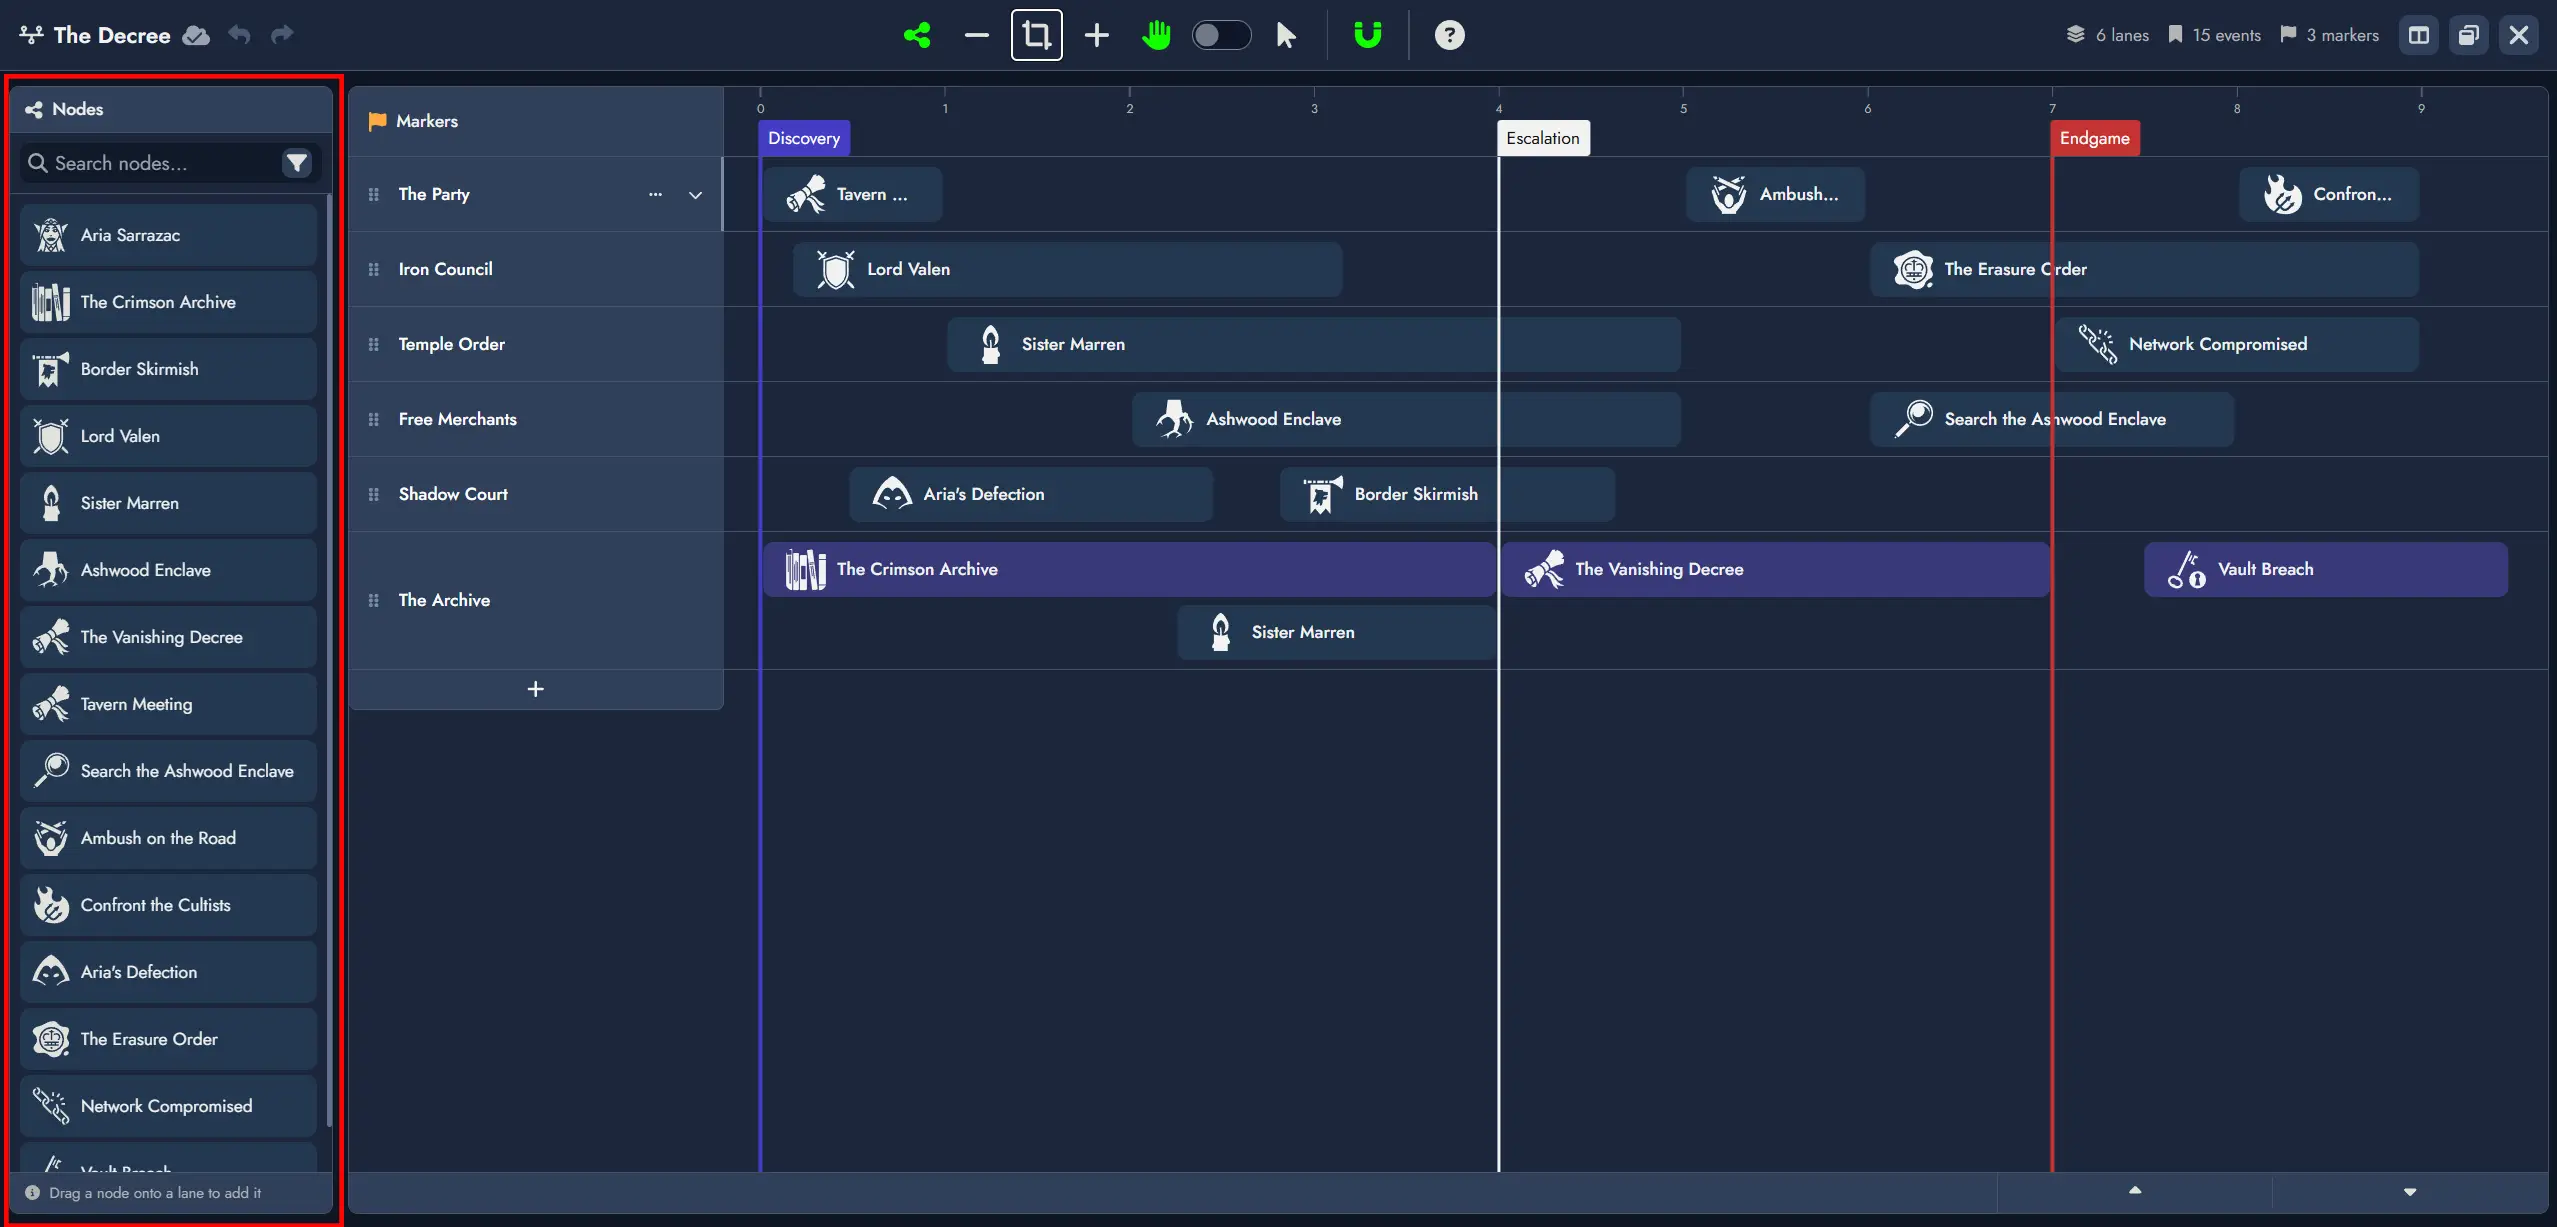
Markers
- Double-clicking on the Markers row places a new Marker at that horizontal position. Marker labels are editable inline after placement.
- In Selection Mode, Markers can be dragged horizontally to reposition them.
- Markers can be deleted via contextual action.
- When multiple Markers share the same position, they render as a small visual stack, each preserving its own label and colors.
Lane Management
- New Lanes are added via the + button below the last Lane header.
- Lanes can be renamed, reordered vertically, collapsed, and deleted.
Creating References
From existing Nodes
Drag a Node from the Node Pool onto a Lane to create a Reference at the drop position. The Reference snaps to the nearest unit boundary if snapping is enabled.
Creating a new Node directly from the Timeline
Double-clicking anywhere inside a Lane creates a new Event Node and places a Reference to it at that position. The Node is immediately accessible from the Board and the Editor like any other Node in the Module.
Reference Spans
References are not limited to a single unit. A Reference can span across multiple units to represent an event, arc, or condition that lasts over a period. On creation, a Reference occupies exactly one unit.
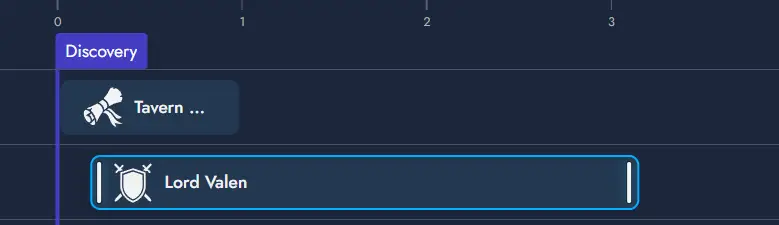
A Reference remembers where it starts and how wide it is, independently of any Marker positions. When snapping is disabled, a Reference can be positioned and resized freely at any point along the axis, without being constrained to unit boundaries.
Reference Interactions
Three gestures operate on a Reference: resize, horizontal move, and Lane change.
Resize
Thin vertical bars appear on the left and right edges of a Reference. Dragging the left handle adjusts the start position; dragging the right handle adjusts the end position. The opposite edge remains fixed. Both snap to unit boundaries on release when snapping is enabled.
Move
Dragging the body of a Reference (anywhere that is not a resize handle) moves the entire span left or right without changing its width. A ghost placeholder follows the cursor, indicating where the Reference will land. Snaps to unit boundaries on release.
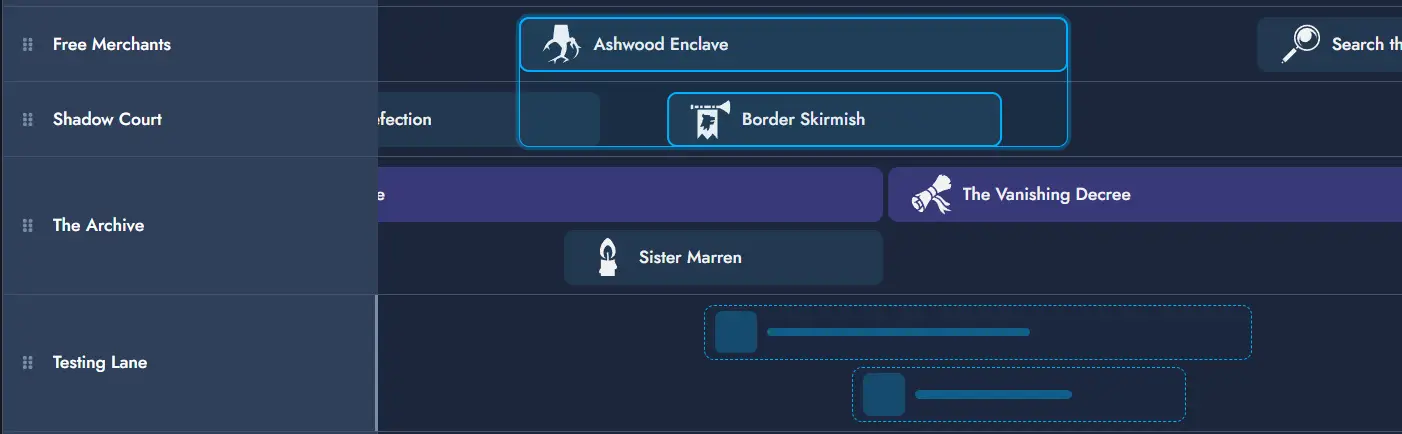
Lane Change
Lane changes are initiated from the same body drag as horizontal moves. By default, a body drag moves the Reference horizontally within its current Lane. If the drag crosses a vertical threshold (approximately half the Lane height), the Reference enters Lane change mode: the placeholder snaps to the target Lane row as the cursor moves vertically. Releasing drops the Reference into the target Lane at the current horizontal position.
Timeline Tokens on the Board
A Timeline Asset can have multiple independent Timeline Tokens on the Board. Each Token is a resizable viewport into the Timeline. Timeline Tokens can be moved, resized, and customized like other Tokens on the Board.
Interactive Mode
By default, Timeline Tokens on the Board are not interactive. To explore a Timeline interactively, enter interactive mode by double-clicking the Token. Press Escape to exit, or click outside the Token. Interactive mode is also automatically disabled after a brief period of inactivity.
Token Toolbar
Each Timeline Token features a floating toolbar with quick access to common actions:
- Interaction toggle: enables or disables interactive mode on the Token.
- Interaction Lock toggle: prevents usage of interactive mode.
- and Zoom controls: adjust the visible unit range within the Token viewport. Each Token maintains its own zoom level independently.
- Fit to Content button.
- Automatic Height toggle: when enabled, the Token automatically adjusts its global height to fit the Timeline's content at all times.
- Always fit content after resize toggle: when enabled, the Token automatically applies Fit to Content at the end of any resize operation, keeping the full Timeline visible.
- Edit Timeline: opens the Timeline in the Timeline Editor.
- Lock Token toggle: prevents any customization and interaction. Can only be unlocked from the context menu.
- Token Properties button: opens the Token Properties floating window.
Token Settings
The Token Properties window provides the following options:
- Title alignment (left, center, right).
- Hide name toggle.
- Name horizontal and vertical offsets.
- Name font and size.
- Border style selection.
- Keep Aspect Ratio toggle.
- Mask selection.
- Content Scale: proportionally scales the Token and all its inner components. This is a sizing property, not a navigation property, and has no effect on how many units are visible.
- Automatic Height toggle: when enabled, the Token always adjusts its global height to fit all displayed Lanes.
- Always fit content after resize toggle: when enabled, the Token automatically applies Fit to Content at the end of a resize operation.
- Show lane headers toggle: enables or disables the left column with the Marker and Lane headers.
- Lane visibility: per-Lane toggles to control which Lanes are visible in this Token.
- Marker visibility: per-Marker toggles to control which Markers are visible in this Token.
Lane and Marker visibility settings are independent per Token. This allows different Tokens to display different slices of the same Timeline. For example, one Token can show all Lanes while another shows only the player-facing Lane.